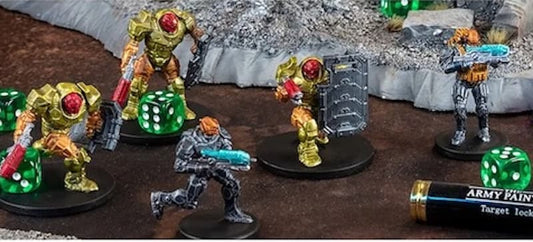
Ever found yourself eyeing wargame miniatures, perhaps a bit too long, taken in by the impeccable details? Let's be honest, some miniatures just have that "oomph." It might be the vibrant colors, the razor-sharp lines, or simply how they stand out amongst the other miniatures in a Warlord game.
So, what's the secret sauce? Which miniature painting techniques turn these figures from simple molded plastic to tabletop titans? Brace yourself as we uncover the methods that bring these figurines to life.
1. Shading
Shading is a painting technique that involves adding depth, dimension, and realism to miniature figurines. Imagine a flat drawing suddenly gaining depth and character when shadows are added. That's what shading does for miniatures. It's the act of using darker tones to highlight recessed areas, providing a contrast that makes details pop.
When painting your miniature, consider using the following shading techniques:
- Dark washes: Thin out darker paints, let them flow into crevices, and watch your miniature come to life.
- Recess techniques: Apply shade with precision only in the recessed areas. It's like targeted magic for your miniature.
- Oil washes: Oil paints mixed with thinners offer a different kind of shading. Applying them can be a little challenging, but the results are worth every drop.
2. Dry Brushing
Dry brushing is a swift, efficient way to emphasize the intricate details of a miniature. It's the painter's secret weapon - especially when time is of the essence. Even those new to miniature painting can wield this technique with ease and see immediate results.
This method doesn't demand a vast arsenal of tools; a basic brush and some paint get the job done. Best of all, when used judiciously, dry brushing elevates the miniature's aesthetics, making it pop on the tabletop.
Tips for getting started with dry brushing:
- Before brushing, ensure the model is free from mold lines and gaps.
- Apply varying pressure to control paint release. Lighter strokes for highlights, firmer for broader coverage.
- Direct brush strokes matter. Top-down for edges, circular for broader areas.
- Introduce multiple colors in layers for richer, more vibrant results.
- Don't rely solely on dry brushing. Combine with other techniques for a refined finish.
3. Layering and Glazing
Layering and glazing are like the salt and pepper of miniature painting. They spice up your miniatures, taking them from bland to bam.
● Layering Unpacked
Layering in miniature painting works just like dressing for cold weather. You start with a base and then add layers. Begin with darker shades, and gradually apply lighter ones on top. It creates depth and pops out those highlights.
Imagine painting the armor on a tiny knight. Using layering, you'll see that armor glisten with a depth that narrates tales of valor.
● Opaque vs. Translucent Paint
Your painting palette offers two heroes: opaque and translucent paint. Think of your opaques as a solid curtain. The translucent (like glazes) are more like a sheer that allows you to see hints of what’s beneath.
● The Grace of Glazing
Glazing is like painting with whispers. It's about using translucent paints that allow the colors beneath to shine through.
There are special mediums out there that can make your regular paints a bit more translucent. They're like the trusted squire by the knight's side, ensuring things run smoothly.
Pro Tip: For a standout miniature, mix layering and glazing. Once your masterpiece is ready, add a final touch: a crisp edge highlight. This not only defines shapes but also gives a dramatic stage presence. The key? Contrast. Try using a vibrant paint color for the highlight over a muted backdrop. It works wonders.
4. Stippling
Stippling the art of dotting paint onto your figures to craft depth and texture. Imagine giving that knight's armor a history just with dots. Start with a sponge for a broader effect that's perfect for mimicking wear and tear.
As you aim for more precision, a brush becomes your tool of choice. Those tiny details come alive with carefully placed dots. A tip for enthusiasts: layering deepens the stippling effect. Apply multiple layers of carefully placed dots in varying colors for richer textures and depth.
The fun is in dot density. A few dots here and there evoke a battle-hardened look, while a sea of them gives the feel of untouched armor. Get started with stippling, refine your technique, and captivate onlookers with the details on your miniatures.
5. Airbrushing
Airbrushing is another technique that can make your miniatures stand out from the crowd. Think of it as the espresso shot of painting – intense and finely-tuned. Instead of slapping on color, you're strategically guiding it.
To get started with airbrushing:
- Master the spray pattern: Understand how paint projects from the nozzle and control its path for precise application.
- Learn blending techniques: Experiment with blending textures by airbrushing translucent paint (glaze) over a textured underpainting for depth.
- Grasp the cone dynamics: Recognize that paint forms a cone as it leaves the nozzle. The cone's interaction with the surface impacts the final look.
- Experiment actively: Play with air pressure, paint viscosity, and distance/angle from your model to hone paint application skills.
Imagine giving your model's cloak that perfect gradient, or highlighting the armor just so. The trick? Know your angles and play with pressure. And if you ever wonder if it's worth the effort, just picture a miniature army, bearing seamlessly blended colors, in position on the battlefield.
6. Wet blending
Wet blending is a painting method used to create smooth color transitions on miniatures. Instead of having abrupt color changes, you get a soft and gradual shift from one shade to another. It's like watching a gentle sunrise where colors seamlessly blend into each other.
To start with wet blending, you need two things: a good brush and the right paint.
- Brush: Pick a brush with a full, round middle, known as the "belly." This holds more paint, which means it stays wet longer, giving you more time to blend.
- Paint: Go for paints that dry slower. They give you a better window to work the colors together on the miniature.
The process is relatively simple:
- Apply your first color to the area of the miniature you want to paint.
- While that paint is still wet, introduce the second color right next to or over the first.
- Using your brush, mix them directly on the miniature, brushing side-to-side. The key is to merge the edges of the colors so they smoothly transition.
It might sound easy, but like any art, it takes practice. Start with areas where a color shift would look natural, like the transition from light hitting a character's shoulder to the shadow underneath.
Remember, patience is your friend here. With some practice, you'll soon see the amazing effects wet blending can produce on your miniatures.
Final verdict
We've explored seven key techniques for painting miniatures. While there are many methods and styles out there, these techniques serve as foundational steps for hobbyists. As you continue your miniature painting journey, remember to enjoy each step and make the craft truly your own. Painting Black Seas miniatures can be just as rewarding as winning the game.
Infographic
Ever enchanted by wargame miniatures with an unmistakable wow factor? Dive into our infographic, uncovering the secrets of miniature painting techniques that transform molded plastic into tabletop titans. Explore shading, dry brushing, layering, glazing, stippling, airbrushing, and wet blending for vibrant colors and standout features that breathe life into these figurines.