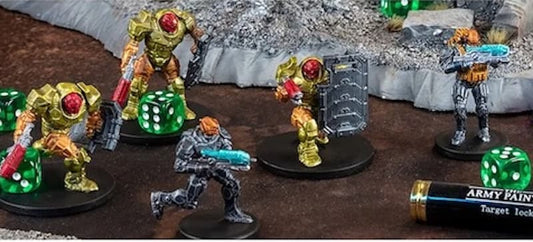
Metallics are everywhere in miniature painting.
From the sheen of a knight’s sword to the battered armor of a battle-worn soldier, metal details can make or break the realism of your miniature.
But how do you paint them? Do you go with Non-Metallic Metal (NMM) for its painterly effect, or True Metallic Metal (TMM) for that shimmering, realistic finish?
Each technique offers something unique. And the right choice depends on your style, your mini, and the story you want to tell.
What Is True-Metallic Metal (TMM)?
True-Metallic Metal uses metallic paints with real metal flakes to create a shiny, reflective finish. The light bounces naturally, making your miniatures look polished and realistic.
It’s easier to learn and quicker to apply. You don’t need advanced skills to get solid results. For large armies, TMM saves time without sacrificing the metallic effect.
What Is Non-Metallic Metal (NMM)?
Non-Metallic Metal uses standard paints to imitate the look of metal. Instead of metallic pigments, you paint highlights and shadows to mimic how light behaves.
This technique gives you control. You decide where the reflections and light should go. It works well for detailed display pieces or photos.
Differences Between TMM And NMM
Now that you have a basic idea of True-Metallic Metal and Non-Metallic Metal, let’s take a look at how they compare.
Materials and Application
If you’re using TMM, you’re working with metallic paints. These have actual metal flakes, so they reflect light naturally. It means the shine is already built into the paint, which makes things easier.
With NMM, you’re using regular matte paints. Instead of relying on natural shine, you control the light and shadows. It means you’ll need to paint each reflection and shadow by hand to create the illusion of metal.
If you’re after realism with minimal effort, TMM is the way to go. If you want complete control over the metallic look, NMM gives you that freedom.
Learning Curve
If you’re just starting out, TMM is easier to pick up. The metallic paint does most of the work. Add a base coat, throw on a wash, and maybe highlight a bit—it’s simple.
NMM takes more practice. You’ll need to think about where light hits, how it bounces, and how to create smooth blends. If you skip these steps, it can end up looking flat or more like plastic than metal.
TMM is great for beginners. But if you’re up for a challenge and want to level up your painting, it is worth learning how to use NMM painting techniques.
Skill and Technique
TMM is the simpler technique to learn. You paint the metallic areas, add some washes for depth, and finish with highlights. The metallic flakes do most of the heavy lifting when it comes to realism.
NMM takes a bit more patience. You’ll need to understand how light behaves on metal surfaces and then recreate it with careful blending and layering. It’s a technique that rewards precision and practice.
If you’re new to miniature painting, TMM can help you get good results faster. But if you’re ready to challenge yourself, NMM is where the real artistry comes in.
Texture and Finish
TMM paints can leave a slightly grainy texture because of the metal flakes in the paint. While higher-quality paints minimize this, cheaper options may look rough when dry.
NMM, using standard acrylic paints, achieves a smoother finish. With careful blending, you can create buttery transitions that feel polished and professional.
If texture matters to you, NMM gives you more control over the final surface quality.
Creative Control
If you’re using TMM, you’re working with what’s already there. The metallic flakes reflect light, and you’re just guiding the process with washes, highlights, and shadows.
With NMM, you’re in the driver’s seat. You are deciding exactly where reflections go and even adding environmental effects, like the glow of a fire or a blue sky reflected on armor.
If you want a realistic, no-fuss finish, TMM has you covered. But if you’re looking to create something unique, NMM lets you push your creativity further.
Time and Effort
TMM gets the job done quickly. A base coat, a wash, maybe some dry brushing—and your model is ready to go.
NMM requires time. There’s blending, layering, and tweaking to make the illusion of metal believable. Rushing this can leave things looking flat.
When time is tight, TMM’s speed is a lifesaver. If the goal is a single masterpiece, though, NMM rewards the time spent.
Photographic Appeal
TMM can be hit or miss in photos. The metallic paints reflect light naturally, which sounds great until the angle or lighting creates unexpected glares. You might find the shine looks uneven or distracts from the details you worked hard on.
With NMM, you paint the highlights and shadows yourself, so the light and dark areas stay exactly where you place them. This gives your miniatures a consistent, polished look from every angle.
If you’re sharing your work online or entering contests, NMM gives you full control over how your miniatures look. With TMM, you’ll need to tweak the lighting or test angles to get the best results.
Cost and Accessibility
TMM paints tend to be slightly more expensive because of the metal pigments. Premium metallics with fine flakes cost more but deliver smoother results.
NMM uses standard acrylic paints, which are usually more affordable and widely available.
If budget is a factor, NMM can be more accessible, especially if you already have a collection of non-metallic paints.
Final Verdict
Choosing between TMM and NMM comes down to your goals and style.
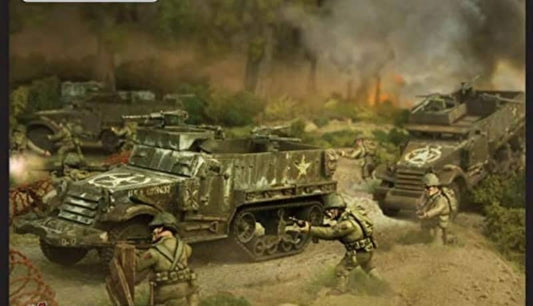
If you’re building an army of military miniatures, TMM offers speed and realism with minimal effort.
For detailed display pieces or miniatures in competitions, NMM excels by giving you full creative control over reflections and lighting.
Overall, both techniques have their place in the miniature painting hobby. It’s entirely about what excites you and fits your project needs.