You’ve been there. The tanks are pressing hard. Infantry is closing in. Your units feel stretched thin, and you glance at the table edge. Where are my reinforcements?
Then they arrive. Fresh troops, ready to strike. The timing feels perfect, and suddenly, the tide of the battle shifts. A weakened flank holds strong. A vulnerable objective gets captured. Your opponent’s plans? Completely derailed.
But reserves can’t just wander wherever. Missteps can leave them stranded or late to the action. A well-placed unit, though? That’s how you turn the game around.
Let’s get into it. Reserves can be your secret weapon when used wisely, and we’ll cover how to make them count.
What Reserves Do in Bolt Action Wargames
Reserves are the wildcard that keep your opponent guessing. They stay off the board, ready to make their move when it counts. The uncertainty they create forces your opponent to split their attention and rethink their strategy.
When reserves arrive, they can hold a weak flank, strike at a vulnerable position, or reinforce key areas. You can use them to:
- Distract Your Opponent: The threat of reserves forces them to play cautiously.
- Reinforce Weak Points: Reserves can bolster areas under heavy pressure.
- Hit Where it Hurts: Flanking or surprise attacks can disrupt enemy plans.
- Control the Flow: Use them to shift momentum and secure objectives.
How to Use Reserves Effectively
Now that we’ve covered what reserves can do, let’s talk about how you can use them to take control of the battlefield. Planning their role, entry points, and timing will give you an edge in the historical tabletop wargames.
Decide What They’ll Do Before the Game
Start by assigning a clear purpose to your reserves. If you need them to protect flanks or hold objectives, pick units like motorized infantry or light tanks.
Choose fast and flexible units that can quickly respond to threats or seize opportunities. Write them into your plan so you know exactly what role they’ll play.
Skip using slower, setup-heavy units like artillery for reserves. Deploy those from the start, where they can support your army immediately.
Plan Their Entry Points
Pick where your reserves will enter the battlefield. Study your opponent’s likely movements and look for areas where reinforcements will have the most impact.
Set up entry points to reinforce critical areas, like your table edge if you’re defending or a flank if you’re attacking.
Mark potential spots for outflanking. You’ll want reserves to surprise your opponent from the side, pressuring objectives or weak spots they thought were safe.
Bring Them in at the Right Time
Don’t roll reserves onto the board just because you can. Wait for a moment when they’ll deliver maximum impact.
Watch for gaps in your opponent’s positioning. If they overcommit or leave an objective vulnerable, send in reserves to take advantage.
Use later turns to deploy reserves for decisive moves. Turn 3 or 4 is often the perfect time to hit your opponent hard or secure the game’s objectives.
Support Their Arrival with Distractions
Make it easier for your reserves to enter the battlefield by keeping your opponent occupied elsewhere. Use your on-board units to pressure key areas or bait their forces into overcommitting.
Deploy ranged units or artillery to pin enemy units in place. This creates openings for reserves to act without immediately drawing attention.
You can also use fast units to force your opponent into bad positions. When their focus is divided, your reserves will have a smoother entry and a stronger impact.
Combine Reserves with Outflanking Units
Why let your opponent feel safe when you can hit them from two sides at once? Combining reserves with outflanking units keeps them guessing and scrambling to react.
Bring reserves onto the table to pin down their forces or pressure an objective. Then, send your outflankers in to hit their exposed sides or rear.
Time it so both forces strike together. The chaos this creates makes it hard for your opponent to form a counterattack or reinforce their lines.
Pro Tip: Use this strategy to claim objectives as well. Reserves can secure the ground while outflankers deal with nearby threats.
Counter Your Opponent’s Reserves
Your opponent likely has reserves too, so don’t forget to account for them in your strategy. Watch for signs of where they might enter and plan your positioning to respond.
Use terrain and unit placement to limit where their reserves can strike. Deny them access to critical objectives or vulnerable areas.
If their reserves enter too aggressively, focus fire to eliminate them before they can do serious damage. Quick, coordinated action can neutralize their impact.
Units to Keep in Reserves
After all the planning, the question remains: which units belong in reserves? The right choice depends on their role and impact when they arrive.
- Fast-moving Units: Light tanks or motorized infantry can quickly reinforce weak points or pressure objectives.
- Anti-tank Teams: Bazooka and Panzerschreck squads are perfect for dealing with enemy armor once it’s revealed.
- Specialist Infantry: Units like veterans or assault troops adapt well to changing situations, making them versatile reserves.
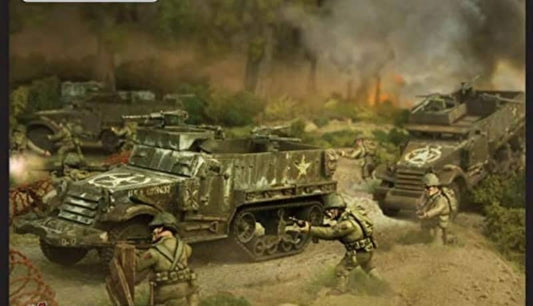
- Transports with Units: Loaded trucks or half-tracks can deliver multiple squads to the battlefield at once, increasing efficiency.
- Avoid Slow Units: Artillery and heavy weapons teams struggle to make an immediate impact and are better deployed early.
Choose units that can react quickly and hit hard when they enter the fray.
Leverage the Advantage
Reserves do more than fill gaps—they add flexibility, timing, and control to your game. Handle them well, and they’ll shift the battlefield in your favor.
Use reserves to strengthen defenses, hit weak spots, or claim objectives late in the game. They give you the tools to adapt and take charge.


