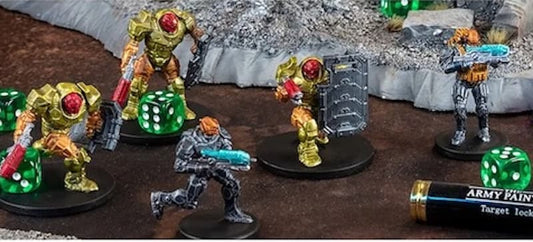
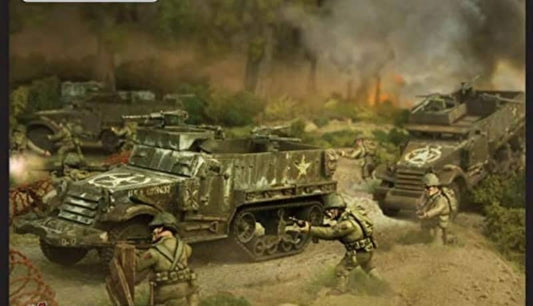
Looking for new ways to create stunning wargaming terrain? Then you’ve come to the right place.
Terrains make your game immersive and exciting. But buying them can be expensive. That's where knowing how to create your own terrain comes in handy.
There are many ways to make your own terrain—from simple DIY projects to detailed builds. Below, we'll explore a variety of methods and techniques to help you craft the perfect battlefield for your games.
Use Reference Books and Photos
One of the best ways to start is by looking at reference photos and books. The internet is full of inspiring images and ideas. You can find countless books online about wargaming and terrain building, which offer detailed instructions and materials. For example, "Wargames Terrain & Buildings: The Napoleonic Wars" provides great insights into scratch building terrain. Although the historical period might differ from your game, the techniques are adaptable.
DIY Techniques
Basic Materials
- Foam board and cardboard: Use foam board or cardboard to create structures. Cut and shape them into buildings or ruins, then paint and texture them to match your game’s aesthetic.
- Styrofoam: Styrofoam is excellent for making hills and rocky terrain. Sculpt it with a knife, smooth it with sandpaper, and paint it to add realistic details.
Papercraft
Papercraft is a cost-effective way to make terrain. It involves using paper or cardstock to create 3D objects. You can find pre-printed plans online and assemble them. Websites like DriveThruRPG offer a variety of papercraft terrain files. You’ll need a printer and good cardstock to make durable pieces. Printing on cardstock ensures your terrain is sturdy and long-lasting.
Natural Materials
Collecting natural materials like rocks, twigs, and moss can add realistic elements to your terrain. Bake the materials to sterilize them, then use them to decorate your terrain pieces. This method is both cost-effective and adds an authentic touch to your game.
Dirt and Grout
For realistic ground textures, mix soil and tile grout. Collect soil from your garden, bake it to kill microorganisms, and mix it with grout. Sprinkle the mixture over PVA glue and seal it with isopropyl alcohol and matte sealant. This technique creates durable, realistic terrain without the need for painting.
Cork Tiles
Cork tiles are perfect for making stone walls, rocky outcrops, or tiled floors. You can easily cut them into the desired shapes and paint them to achieve a natural look. Cork is also lightweight and easy to work with, making it ideal for various terrain projects.
Upcycling Household Items
You can create unique terrain pieces by repurposing everyday household items. For instance, bottle caps can become barrels, old CDs can serve as bases for terrain features, and plastic containers can be transformed into futuristic buildings. This method is budget-friendly and environmentally friendly, making it a great choice for creative terrain making.
MDF Boards for Modular Terrain
Creating a modular board with MDF wood is another excellent method. Use MDF sections to build a modular board that can be rearranged for different scenarios. Add plaster or caulk for texture, and paint it using basic techniques like base coating, washing, and dry brushing. This approach allows for a customizable and durable game board.
Scratch Building with Insulation Foam
Creating terrain using pink insulation foam is super easy and efficient. Start with a pink insulation foam board from a hardware store and a foam cutter. Use a knife to cut the pieces straight. Mark the dimensions of your terrain piece, making the footprint larger than needed to account for trimming.
Use a hot-wire cutter to shape the foam, removing sharp edges to give it a natural look. Cut into the foam at an angle to create slopes, ensuring there’s enough space for miniatures. If you want to add details like craters or cracks, an old screwdriver works perfectly. Stab or drag it across the foam to create the desired effect.
Glue the pieces together with wood glue, covering the flat surfaces with glue and scattering sand for texture. Let it dry, then paint it with a base coat of black spray paint. Once dry, apply house paint and let it sit overnight. Dry brush with colors like Dawnstone Grey and add additional colors for realism.
Using 3D Modeling Software for Terrain Creation
3D modeling and printing offer exciting opportunities for creating custom terrain pieces for your miniature tabletop games. Here’s a basic outline of how you can use 3D modeling software to bring your terrain ideas to life.
Download Pre-Made Models
One easy way to start is by downloading pre-made building or terrain files. Websites like Thingiverse are filled with free 3D files. Just search for "wargaming terrain" to find a variety of designs. These files can be modified to suit your needs before printing.
Model from Scratch
If you want something unique, you can model the building in 3D from scratch. Software like SketchUp and Fusion 360 are great for beginners. Both have free versions and plenty of tutorials on YouTube to help you get started. SketchUp is user-friendly and perfect for simple designs, while Fusion 360 offers more advanced features for detailed modeling.
Printing Your Models
Once you have your 3D model, you can print it if you have a 3D printer. The quality of the print depends on the model file and your printer settings. Printable Scenery and other similar sites offer professionally made 3D terrain files, which can be a good resource if you prefer ready-made designs.
Using 3D Models as Blueprints
If you don't have a 3D printer, you can still use 3D models as blueprints for scratch building. Print out the model dimensions and use them as guides to create terrain pieces with materials like foam board, cardboard, or plastic. This method allows you to replicate the details and structure of digital models using traditional crafting techniques.
Be Creative
Creating the ideal terrain for historical tabletop wargames can involve using a variety of techniques and materials. If you're just starting out, begin with inexpensive DIY projects. See what works and what effects you can achieve. As you gain experience, look into 3D printing and advanced techniques—or even hire a professional. The perfect result may take a few tries but learning how to make your vision come to life is part of the process too.