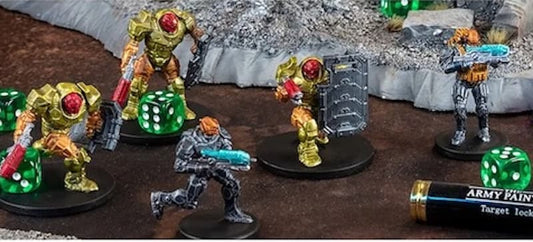
Tiny figures, towering ambitions? Whether they are part of your newest tabletop game or key pieces to your historic recreation, picking up a paintbrush to begin painting your miniatures can feel overwhelming. You're ready to delve into miniature painting, but you want the results to match the picture you have in your mind. It will bring your set to life.
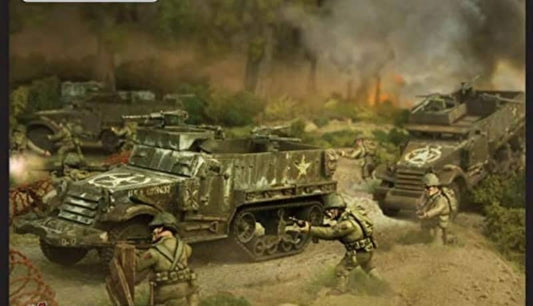
In this beginner’s guide, you’ll learn the steps required to transform that untouched plastic into a tabletop masterpiece. Whether it’s a knight from Warlord Games Bolt Action or a soldier from the Konflikt 47, the techniques remain the same. Here’s how to proceed:
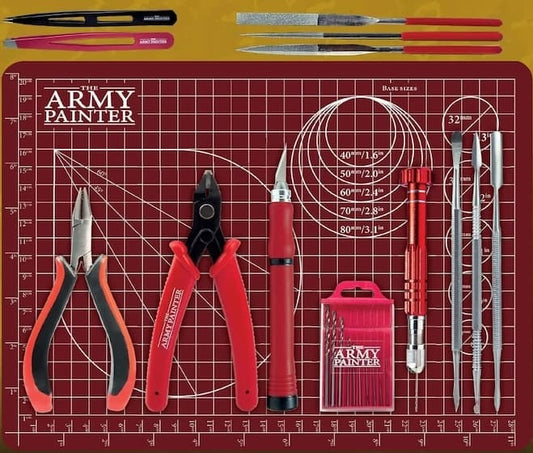
Step 1: Stock up on essentials
Getting started with miniature painting requires the right supplies. Start by selecting paint brushes tailored for specific tasks:
- a fine-tip brush captures detailed highlights
- a small brush covers lesser areas of the figure
- a larger brush handles base coating and washing
- a stiff-bristled brush excels at dry brushing
Choose quality brushes for both precision and long-lasting use.
Next, pick your paint and primer. Choose paints that align with your vision for the miniature. Usually, a few primary shades work for skin, armor, and cloth. Gold and silver metallics are popular choices, as well as brown for leather and straps on models.
Keep it simple when starting out. Master a basic color scheme before exploring a wider range of hues. While hand-painting a primer works, using a spray primer gives more consistent coverage and provides an adhesive base for details.
For painting, you'll need a palette. No need for anything fancy – the lid of a plastic container or a ceramic tile works as a great makeshift palette. If you're considering an upgrade, think about a wet palette. But for metallic paints, a standard palette ensures no paint separation.
Step 2: Prep your miniature
Once you've gathered your supplies, get your chosen figure ready for painting. Use a flat-edged cutter to take the model parts off their frame for a clean finish.
Look for mold lines on the parts. These can disrupt both assembly and painting. With a crafting knife, remove these lines for a smooth surface.
When putting together miniatures like knights or futuristic astronauts, pick the right adhesive. Poly cement is great for traditional plastics and super glue works with materials such as resin or metal. Ensure joints fit snugly for a long-lasting bond.
You can also add extra details to boost your model’s realism. For example, consider drilling small holes in areas like a space helmet's air vents or adding texture to a knight's shield. If you discover gaps or flaws during assembly, turn to modeling putty. Mold it into shape with sculpting tools and allow it to set for a few hours for a sturdy finish.
Step 3: Lay a solid foundation with primer
Imagine your miniature as a canvas waiting for its first brush of color. A full coat of primer ensures that your colors adhere well and showcase the true vibrancy of the colors you choose.
First, select your primer color. Black creates depth and captures shadows, making details stand out. Grey is the versatile choice, a neutral base for any color palette. If you're aiming for a striking brightness, go for white.
Before using the paint on your miniature, give it a quick test to ensure a smooth flow. Then with the can positioned about 20cm from the figure, apply using short bursts. Your goal? A smooth, even coat.
Patience is key. Allow the model to dry for at least one to two hours. For the best results, you might want to wait overnight. Once it’s dry, do a quick inspection. Any missed spots? Now is your chance to touch it up.
Pro Tip: After priming, basecoat your miniature using thinned paint. Multiple light layers enhance color depth and adherence, setting the stage for detailed painting.
Step 4: Splash on the base color
Now, it's all about color. Think about the story your miniature tells. Is it a brave soldier? Maybe a mystical sorcerer? That story begins with your base colors.
Start simple. Select one color for the larger areas, perhaps the skin or armor. Dip your brush in and remember: thin paints work wonders. A drop of water can make all the difference, ensuring your paint doesn’t clump and obscure those tiny details. Paint using smooth, confident strokes. You're painting a story, one brushstroke at a time.
Once you've got those main colors down and they're dry, congratulate yourself. You've just taken a massive step forward. Now, you're set for the thrilling world of shading and detailing.
Step 5: Shade, shade, shade
Shading enhances the depth and dimension of your miniature, making its features more prominent. Begin by applying a wash to the recesses of your model. Washes are thin paints that are semi-transparent. The wash acts like a liquid shadow, sinking into grooves and hollows. Dark brown and black washes are versatile and can even be mixed for deeper shading. Be strategic: applying wash across an entire miniature may darken surfaces you want to remain light.
A more sophisticated technique is recess shading. This method specifically targets the miniature's grooves, leaving flat surfaces untouched. Though it may sound straightforward, it requires careful attention to detail. And to achieve the best results, high-quality brushes are invaluable.
Lighting Tip: Consider employing a hobby lamp that emits cold daylight. Not only does it improve visibility for complex work, but it can also improve the overall quality of your painting.
Another advanced shading method is blacklining. This involves heavily diluting black paint and applying it exclusively to the tiniest of recesses. While this method requires a keen attention to detail, it’s a great way to achieve a pristine, sharply defined finish on your miniature.
Step 6: Refine with detailing and depth
After the shading process, you might discover some regions that became inadvertently shaded. All is not lost. Simply revert to your original basecoat shades and rectify those areas. Pale colors, such as ivory, might require extra diligence.
For figures that boast rounded or uninterrupted contours, a gradient shading method works wonders. Mix your primary shade with a smidge of charcoal, and brush on layers over sections of natural recesses. Using reference images or closely examining real-life objects can help you determine where shadows should be. Remember, patience is key: allow each layer ample drying time to avoid unwanted texture blunders.
Want to accentuate the finer details? Turn to dry brushing. Opt for a luminous shade, limit its liquidity, dab off surplus, and gently whisk it across elevated textures. This technique shines especially on high-relief details, such as the ornate carvings on ancient artifacts.
Get painting
Miniature painting transforms plain figures into vibrant masterpieces with every brushstroke. Every shade and detail you apply brings a world to life on your tabletop. As you start this creative adventure, cherish not only the final masterpiece but also the joy in each step of the process. Grab your brushes, and let's bring art to life.