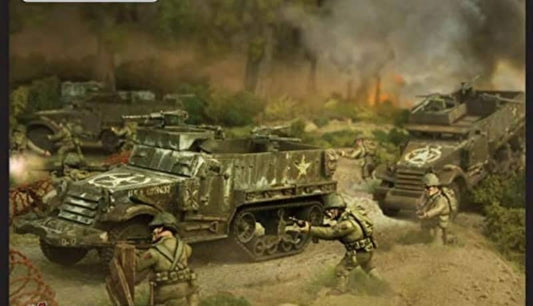
As the icy winds of winter sweep across the battlefield, even the mightiest war machines must adapt to survive. Bolt Action players can recreate this stark reality by applying winter camouflage to their miniature vehicles, giving them the battle-worn appearance of veterans from frozen fronts.
In this guide, we'll explore the art of winter whitewash for Bolt Action vehicles. From priming and coating to chipping and layering, you'll learn how to use miniature painting techniques to give your armored forces that authentic "straight from the Eastern Front" look.
Painting Bolt Action Miniatures for Winter Whitewash
Here are the steps you need to take to apply winter whitewash on Bolt Action vehicles:
1. Prime the Vehicle
Start by applying a primer that matches the vehicle’s intended base color. The primer helps the paint adhere better and ensures a smooth, durable surface. Allow it to dry thoroughly before moving on to the next step—no shortcuts here.
2. Apply the Base Coat
Move on to painting the vehicle in its original color using an airbrush paint or spray paint for an even coat. The base coat should be smooth and cover every part of the model. Let it dry completely before proceeding to ensure a flawless finish.
3. Apply Camouflage Patterns (Optional)
If you want your vehicle to have a camouflage pattern, now is the time to apply it. Use colors like retractive green or saddle brown to create disruptive patterns. Keep in mind that the whitewash will cover most of this, so precision isn’t critical. You can use a stippling technique with a soft brush to apply these colors for a rough, field-applied look.
4. Prepare and Test Your Whitewash Mixture
Mix some white paint with water until it’s thin and almost see-through. You want to create a wash that lets the base color peek through just a bit. Test it on a small spot first to see if it looks right. Adjust until you achieve the winter effect you’re aiming for.
5. Apply the Whitewash Layer
Use a sponge or soft brush to gently dab the whitewash mixture onto the vehicle. Focus on areas where snow and ice naturally accumulate, like flat surfaces and edges. It’s okay if the coverage isn’t perfect—imperfections add to the model’s authentic, weathered look.
6. Create Chipping and Wear with Salt
To achieve a chipped and worn appearance, you can sprinkle salt over areas of wet paint. Once the paint dries, scrub the salt off with a toothbrush or old brush to reveal the base color underneath. This technique is great for simulating wear in high-traffic areas like hatches and edges.
7. Add Realistic Chipping Effects
Dip a sponge in the base color and lightly dab it on the edges and high spots. Think about where the vehicle would naturally get worn down in a harsh winter—that's where you want to focus. A light touch will create realistic chips and scuffs, giving your model a battle-hardened look.
8. Layer in Weathering Details
Now, bring your vehicle to life with rust, mud, and other weathering effects. Use pigments or washes to add those gritty details that tell the story of a machine battling the elements. Create snow effects by mixing baking soda with PVA glue and applying it to the tracks and lower armor. The goal is to make it look like the vehicle has been pushing through snow and ice without going overboard.
9. Apply Transfers and Decals
Once the whitewash and weathering are complete, it's time to apply any transfers or decals. Use a setting solution like Micro Sol to make the decals conform to the model’s surface, especially on textured areas. After the decals are dry, consider applying another layer of weathering to blend them into the overall look.
10. Seal the Painted Surface
After completing the whitewash and weathering, apply a clear matte varnish to protect your work. The varnish preserves the paint job and reduces any unwanted shine. Let it dry thoroughly to prevent smudging or damage during handling.
11. Apply Final Touches and Detailing
Finish off your model by adding small, precise details that make it stand out. Touch up any areas that need extra attention, like painting insignias, highlighting raised surfaces, or adding subtle rust streaks. These final touches bring depth and realism, making your vehicle truly look like it's braved the harshest winter battles.
Storing Your Winter Whitewashed Miniatures
After all the hard work painting your winter whitewashed Bolt Action vehicles, you don't want them getting dinged up. Proper storage keeps your models safe and ready for action. Here are some options to consider:
- Foam Trays: Foam trays contain soft padding that keeps miniatures safe from bumps and scratches. The foam fully surrounds miniatures and protects delicate paintwork from damage. It’s a simple way to keep your vehicles looking their best.
- Silica Gel Packs: These packs are essential for managing moisture in your storage case. Toss a few in to keep the air dry and prevent any damage from humidity.
- Magnetic Trays: These trays firmly hold miniatures in place. If your models have metal bases, they’ll stick to the tray and stay put even when you’re on the move. This option is great if you travel with your Bolt Action armies or have limited space.
- Location, Location, Location: Heat and moisture are enemies of miniature paints. They can cause the paint to crack, peel, or fade over time. Find a spot that’s out of the sun and away from dampness to keep your models in top condition for your next Bolt Action wargame.
Final Verdict
Winter is only a few months away. Why not embrace the spirit by winter whitewashing your Bolt Action vehicles? With the steps above, you should have models that capture the essence of a frosty battlefield. Bring that cold, hardened look to your next game and watch your opponents marvel at your creations.


