Would you like to know the secret to easily painting beautiful & functional miniatures?
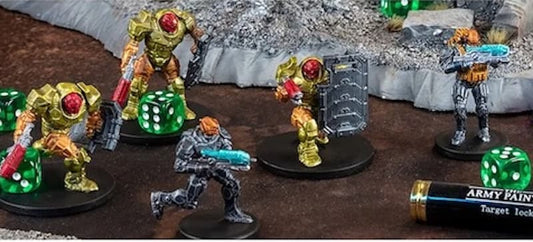
D&D miniature painting is an art form.
But there are secrets that you - a beginner - can use to shortcut your way to good looking miniatures.
We’ve painted thousands of wargame miniatures of D&D Nolzur’s marvelous miniatures, and learn a few tricks along the way.
So if you’re looking for a few techniques that even a brand new mini painter can pull off, you’ve found the right place.
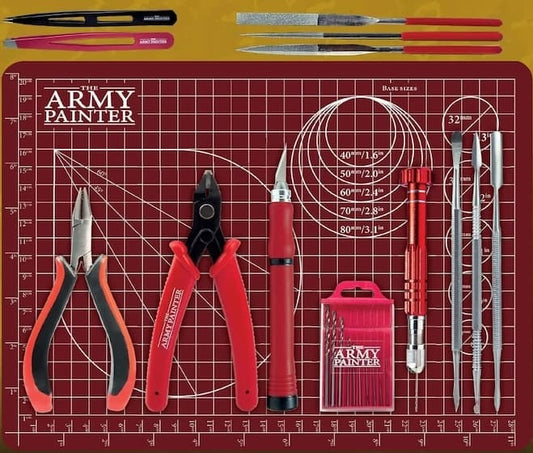
BEFORE WE DIVE INTO SOME MINIATURE PAINTING SECRETS, HERE ARE THE MATERIALS & SETUP YOU WILL NEED:- Miniature Paint Set
- Paint Brushes
- Unpainted Miniatures
- Base
- Optional:
- Miniature paint palette to hold paint
- Small desk lamp for illumination
- Spray primer for miniatures
As far as paints go, the best miniature paint set will not have flow problems and will contain 95% of the colors you could possibly need.
Pro painters will often mix their own colors, but for a beginner, you want a large variety so you don’t have to concern yourself with mixing mistakes.
Quick tip: It’s recommended to spray your mini with a miniature painting primer, as the primer helps hold your paint on the miniature.
Techniques for Beginning Painters
HIGHLIGHTS
The #1 step to creating good, solid looking Pathfinder miniatures or D&D painted miniatures (as a beginner) is to determine the light source.
“Highlighting” or “laying highlights” is where you highlight areas of the miniature that sunlight or a bright light source is hitting.
Highlights is simply painting a light source - and you do that by painting a light color over the miniature.
For example, if you have an adventurer and she is traveling at midday when the sun is highest, the sun will cast shadows in-between the folds of her cloak and on her legs, while causing the tip of her sword (which is strapped to her back), to gleam, just like the crown of her head. Similarly, the tips of her cloak will be brighter, with the ripples closest to the sun being the bright highlights.
Say her robe is blue.
You will first paint the entire robe a blue color. Then, where the sun is hitting directly (the edges and the high ripples, not in the folds where the shadows are), you will paint a slightly lighter shade of blue to represent that area being lit up by a light source.

This adds a tremendous level of realism to your miniature because it will create the illusion of depth just like in real-life.
It is a very easy process and can turn a generic blue robe into cloth with depth and color.
STEPS:
If you’re feeling bold, there is a semi-intermediate technique called layering which expands on this technique of highlighting.
Highlighting is a secret “hack” that will instantly transform your miniature from bland to bold - regardless of skill level.
DRYBRUSH
There’s a technique called “drybrushing” which means you paint without much paint on your brush.
The good news?
It’s super easy to perform.
The bad news is that the technique doesn’t work for everything.
For example, you cannot use dry brushing for the blue robe described above.
Drybrushing Specialty: Drybrushing works exceptionally well for hair, fur, skin, dirt, leather, rocks, metal, and other naturally occurring colorations.
STEPS:
After a couple of strokes, you’ll notice that there is actually a lot of paint on your brush!
The miniature will start to take on the color, in a very unique way, naturally highlighting the animal fur in a way that you couldn’t do by hand.
The key specialty of this technique is that the highlight color will look exceptionally natural - perfect for things from nature like fur hoods, a wolf’s coat, and skin.
WARNING: If you don’t see any color AT ALL, then you probably removed 100% of the paint from your drybrush. Remember, don’t wash your paintbrush off with water, just use the napkin to remove 90-95% of the paint.
WASHES
A “Wash” is a type of thinned out paint. It is very watery and won’t paint the same way as other paints.
When you apply a wash to a miniature, the wash will run to where there is depth (the crevasses, pockets, ripples, and folds). Since a wash is commonly a dark color, it will color that area very dark, which is perfect because those hidden areas would look darker in real life (for example, underneath the hairs of a fur hood will be darker).
Repeat the process two or three times, and you’ll notice the deep areas absorbing the color of the wash.

Specialty of Washes:
- Great for darkening areas with depth (fur, cloth, leather, chainmail, flesh, scars, scales) - Great to highlight
- Pairs exceptionally well with dry brushing
- Amazing for skin
- Amazing for “dirty” clothes & leather
- Large, flat surfaces (like a tank)
If you’re painting Orcs which have a lot of skin, animals, or dirty clothes and leather, washes will leave dark brown or black (depending on the wash) splotches everywhere for a natural “faded and worn” look to these materials.
It will look like your character has worn that leather cloak for a dozen years!
Pro tip: Washes work exceptionally well with dry brushing because the dry brush will highlight the areas hit by the sun, and the wash will sink to the areas with depth.
LAYERING
Layering is a more advanced version of Highlighting that works especially well with cloth.
To layer, you will select 3 shades of the same color - For example, a dark blue, a blue, and a light blue.
Then, starting with the darkest shade, you’ll paint the whole article of clothing in that color. It won’t end up that way, but you have now effectively painted all of the shadows. Let the paint dry.
Then you’ll paint with the middle shade, but you will not paint over the areas where shadows are the strongest (not in the folds of a robe).
Next, once the paint is dry, you will paint the lightest shade, only where you want the bright highlights to be.
This is a simplified version of layering because layering can use as many as 10 shades and colors on a single article of clothing.
But for most instances, you’ll use between 3-5.
Steps:
Pro tip: Not sure what your miniature light should look like? Use the internet to find a real-life version, and see how the light falls on the object (make sure your light sources are similar).
CONCLUSION
If you’re a new miniature painter then bookmark this page so you can use all these techniques on hand when you paint your next miniature.
Some people will prefer different techniques, but technique isn’t what matters; you should just focus on creating a miniature you're happy with.
Roleplaying games are much more enjoyable when you can bring a miniature of your character, and wargamers would agree too!
Pro tip: You can get a collection of D&D unpainted miniatures from our store - every miniature that your party needs from Tabaxi Rangers to Dwarf Paladins, complete with monsters, baddies, and bosses.
If you’re a new painter, check out our list of supplies every painter needs. You’ll be equipped with everything you need to paint and prepare an awesome set of miniatures for your game.
Tag us with your Dungeons and Dragons painting, we’d love to showcase what you do with our paint sets.

Written by: Gilean Benton